MCP
The SciGlass Next MCP server is available in beta preview.
The MCP server lets you connect SciGlass Next to AI assistants and developer tools, giving them secure, context-aware access to SciGlass Next data and capabilities.
Note
The MCP server is currently in beta and may change. Please contact us if you have any questions or feedback.
Note
The MCP server currently runs in stateless mode. This means it does not store user context or data between requests.
Important
You need a SciGlass Next account with access to the database. If you do not have an account, please register first. If your account does not have access, the connection will fail.
What you can do
With the SciGlass Next MCP server, you can:
- Connect SciGlass Next to ChatGPT, VS Code, Claude, Claude Code, or other MCP-compatible tools.
- Let your AI assistant query, analyze, or summarize data from SciGlass Next.
- Build custom workflows powered by natural language and existing SciGlass Next data.
Using ChatGPT
You can connect the SciGlass Next MCP server to ChatGPT on the web when Developer Mode is enabled. Developer Mode is available for ChatGPT Plus plans and above.
Once Developer Mode is enabled, add the SciGlass Next MCP server by following the in-app connector flow.
Note
Business, Enterprise, and Edu plan users should check the official guide here. Developer Mode may appear in a different settings location depending on your plan.
The steps below show the Plus plan flow. ChatGPT's UI may change, so refer to the official guide if the steps no longer match.
Enable Developer Mode
- Open Settings.
- Select Security and login.
- Turn on Developer Mode.
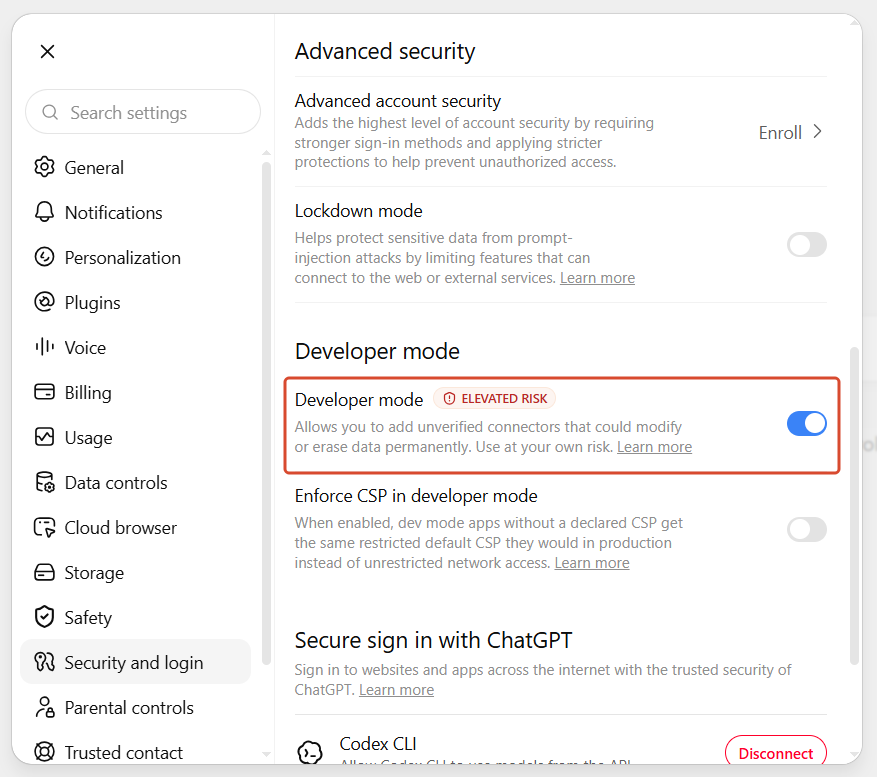
Add the MCP server
- Go to ChatGPT Plugins.
- Select the plus button.
- Enter a user-facing name and description. For example, use
SciGlass Next MCP. You can choose any name. - Under Connection, enter the MCP server URL:
https://sciglass.uni-jena.de/mcp. - Create the connection.
- Review the tools and metadata discovered from the server.
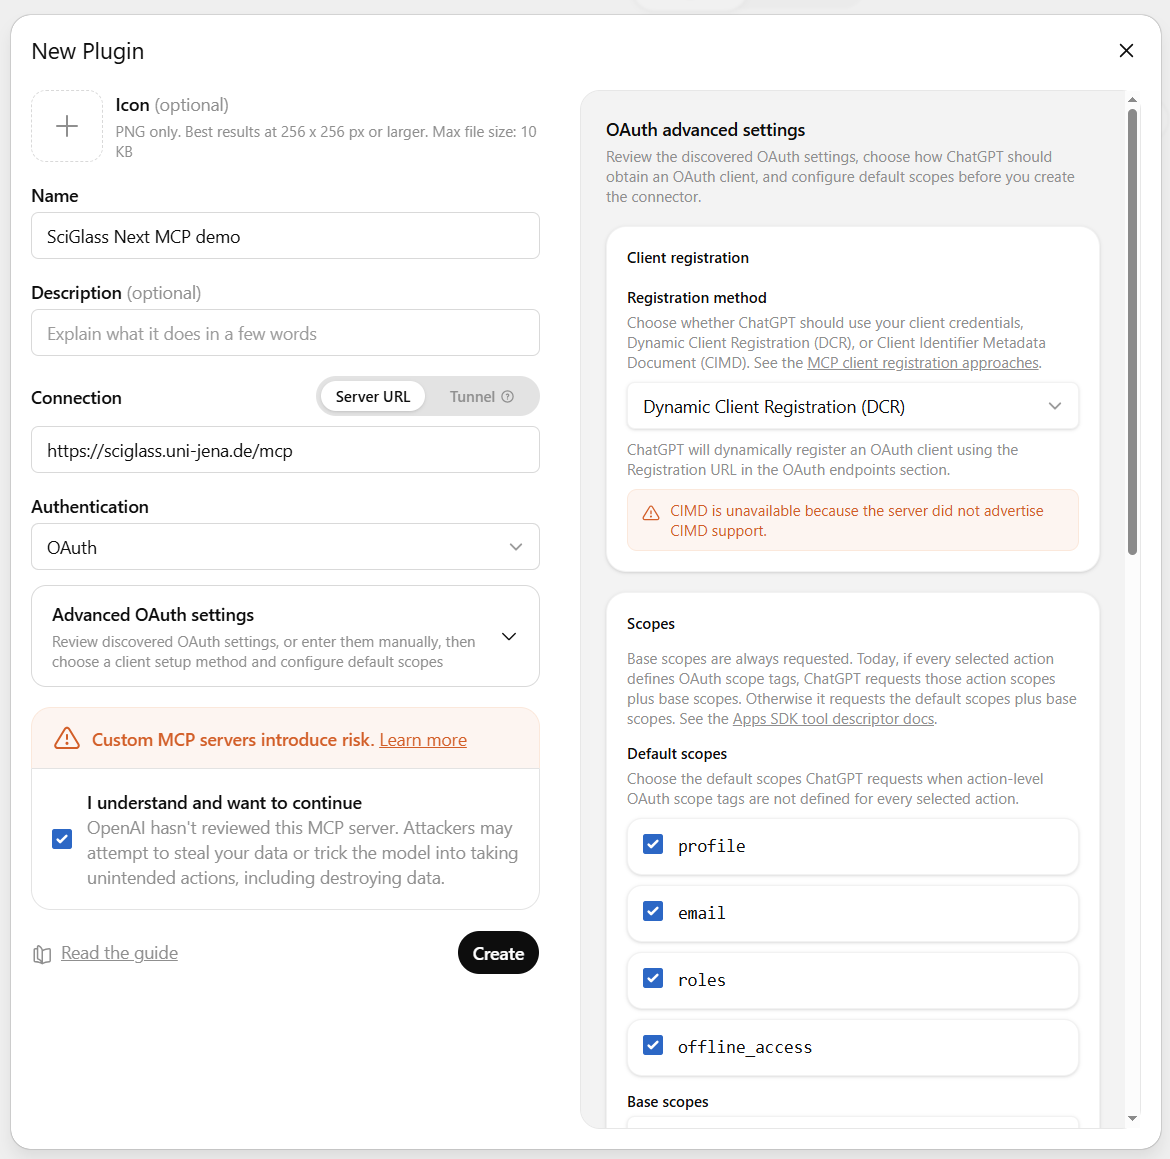
You can open the advanced OAuth settings for review. SciGlass Next currently supports DCR; CIMD support is coming soon.
You will be prompted to log in to SciGlass Next. Log in with your SciGlass Next account.
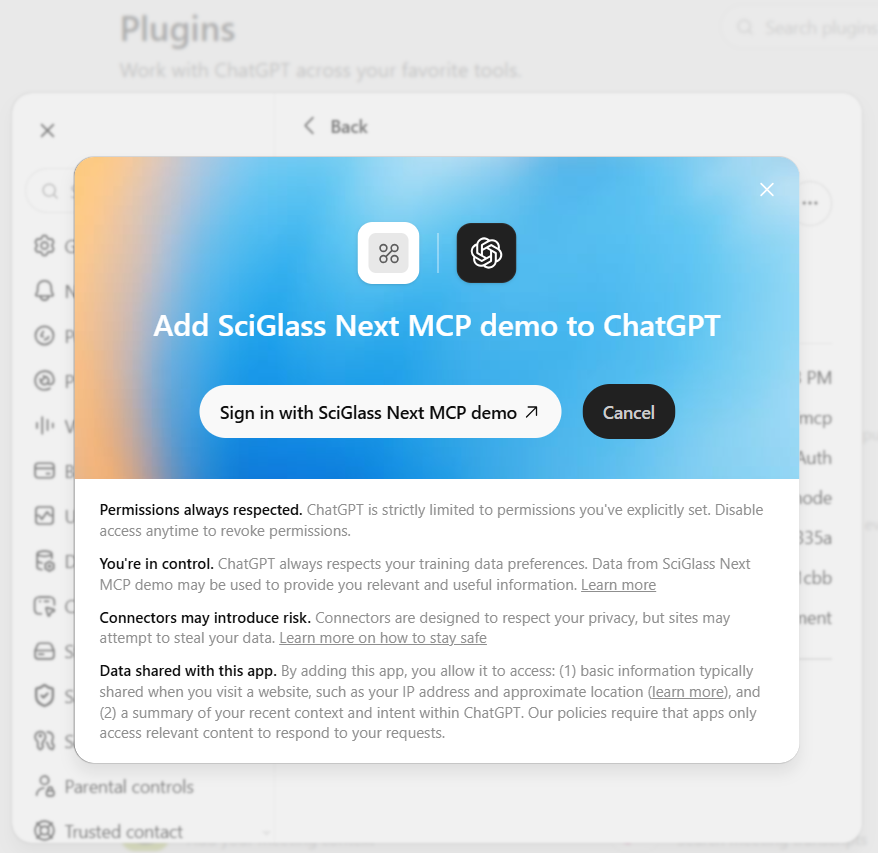
After login, you will be prompted to grant access to ChatGPT. Click "Yes" to allow.
Wait a few moments for authorization to complete. Once authorized, you will be redirected back to ChatGPT.

When the available tools are shown and no errors appear, the connection is successful.
If something goes wrong, check that your account has database access. If you need access, please request it by email.
You can now start using the SciGlass Next MCP server.
Using VS Code
You can also use the SciGlass Next MCP server directly in Visual Studio Code and integrate it into your AI chats.
Follow the official documentation here.
Prepare the mcp.json file:
{
    "servers": {
        "sciglass-next-mcp": {
            "url": "https://sciglass.uni-jena.de/mcp",
            "type": "http"
        }
    }
}
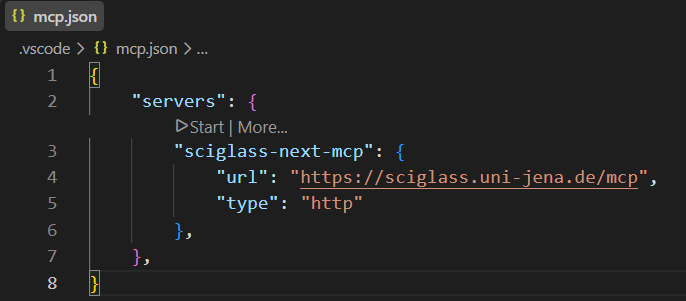
Press Start to connect.
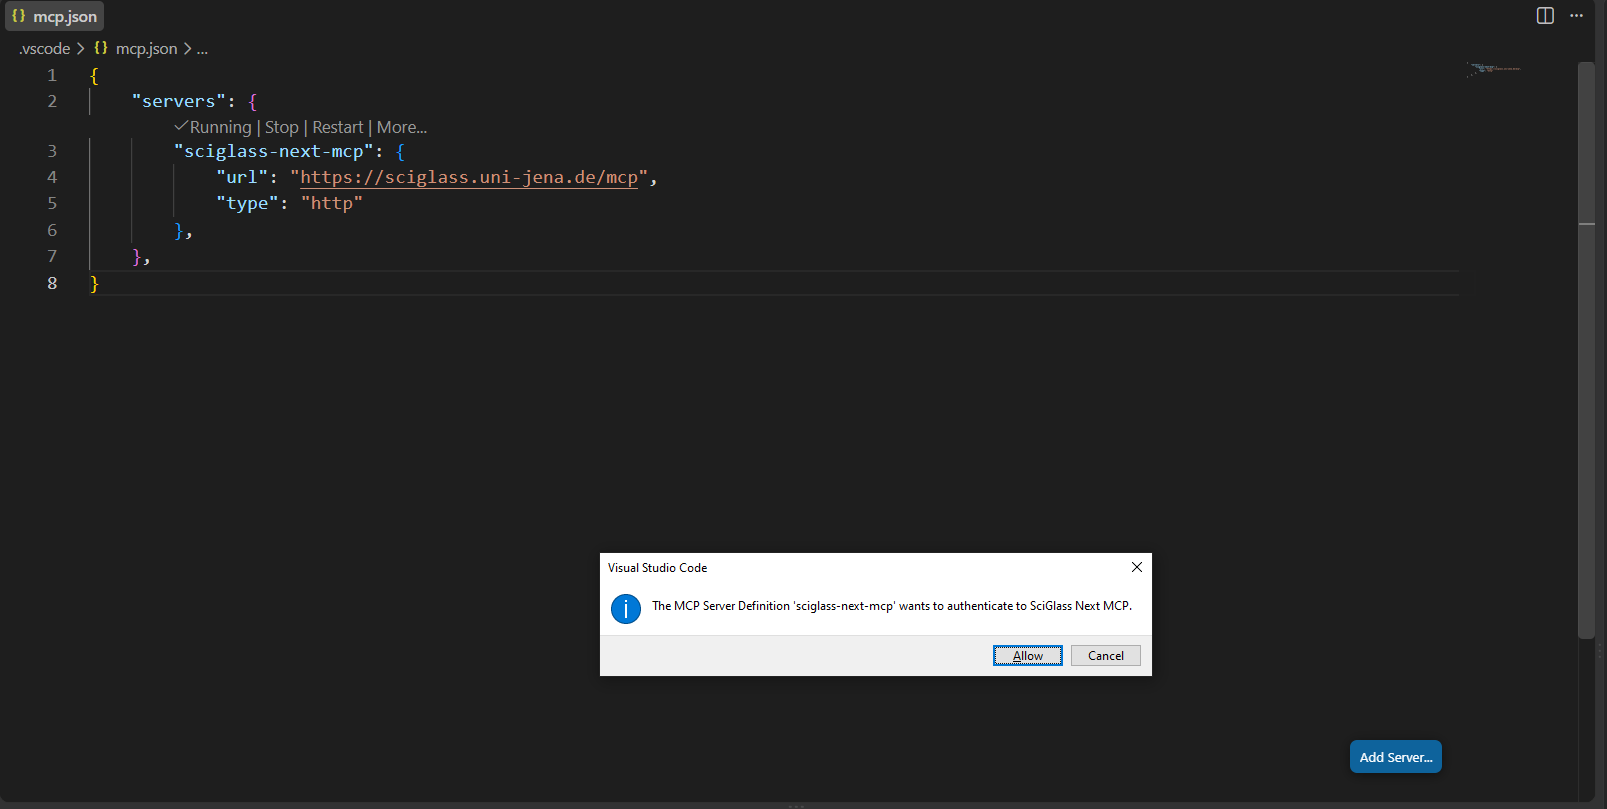
You will be prompted to authenticate to SciGlass Next MCP. Click Allow.
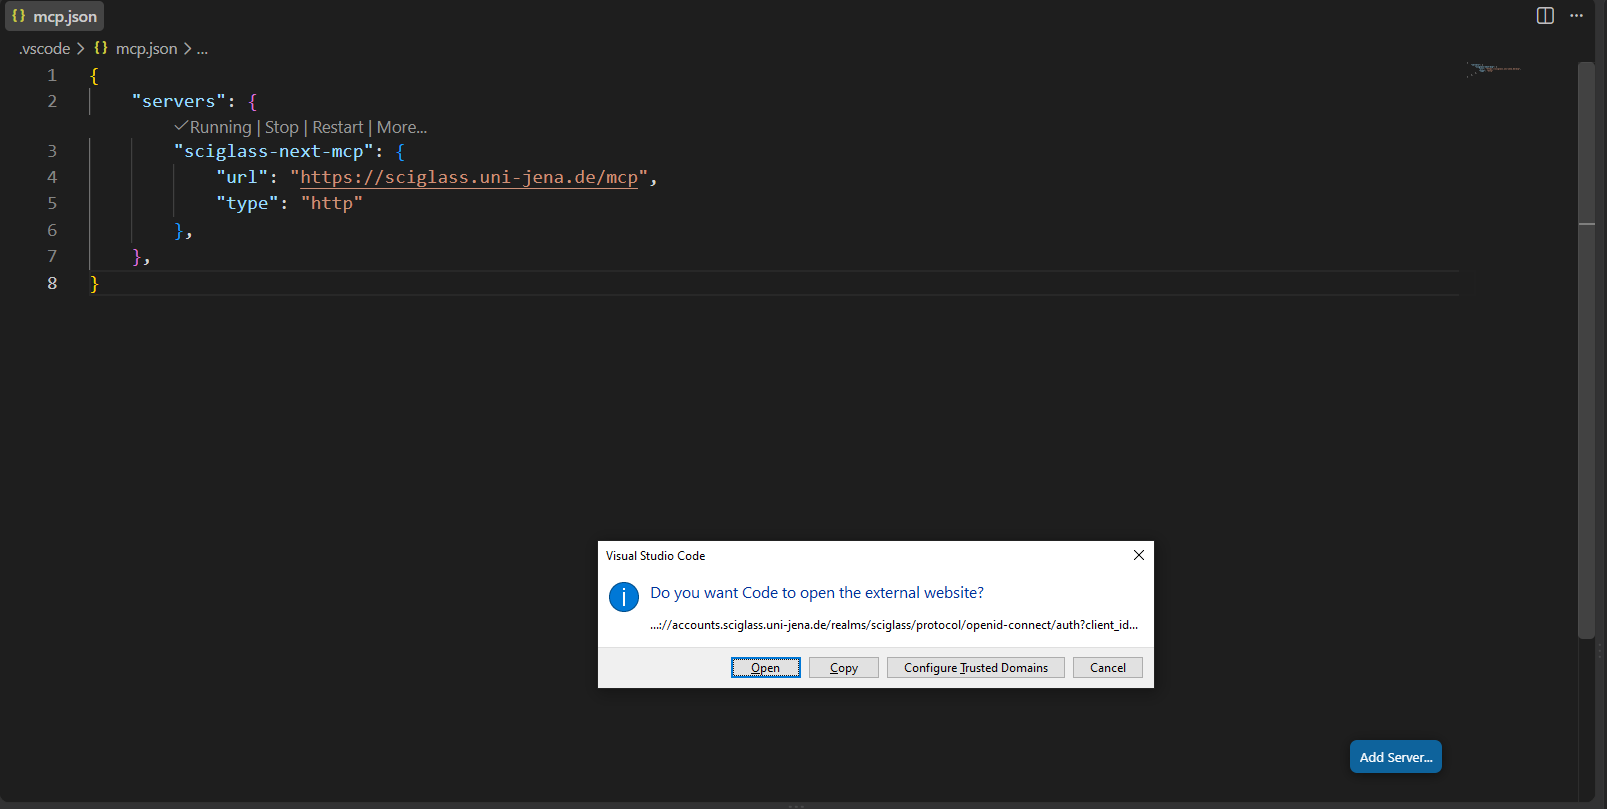
You will be prompted to open the SciGlass Next login page. Click Open.
After successful login, you will return to VS Code and see the available tools.
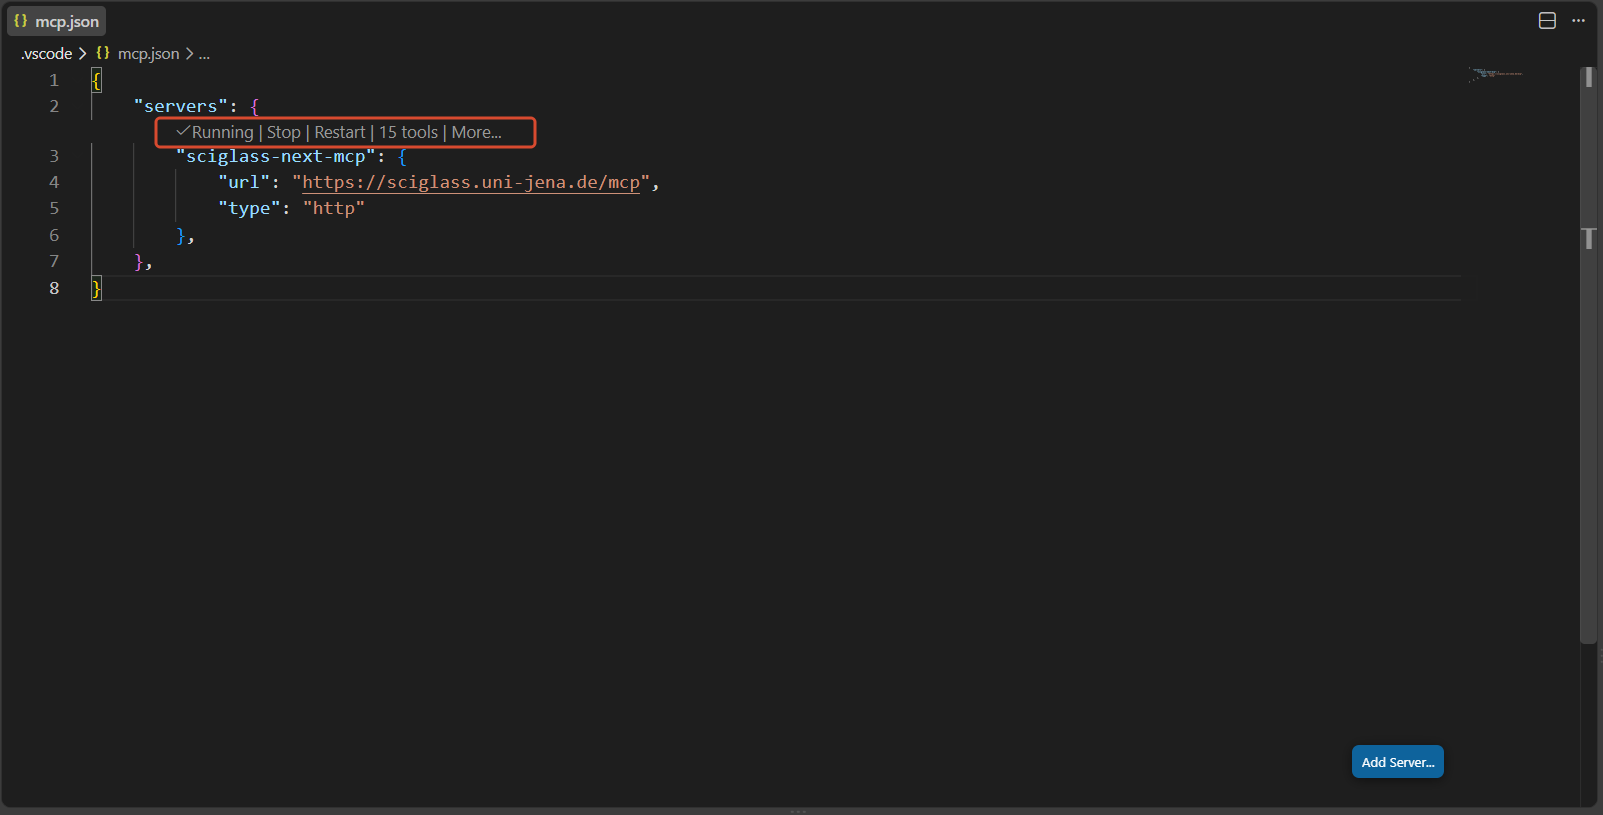
If you encounter errors, try clearing the cached MCP tools or reopening VS Code, then repeat the steps above.
To clear the cached tools, use the MCP: Reset Cached Tools command in the Command Palette.
If that does not work, make sure you are using the latest version of VS Code and that your SciGlass Next account has the correct database permissions.
Using Claude
Please refer to the official guide for details on using connectors.
- Navigate to Customize > Connectors.
- Click the "+" button next to Connectors.
- Select "Add custom connector."

- Enter the connector's name and URL.
Name: SciGlass Next MCP (you can choose any name)
MCP server URL: https://sciglass.uni-jena.de/mcp
- Leave advanced settings (OAuth Client ID and secret) empty.
- Click "Add," then follow the same connection process as directory connectors.
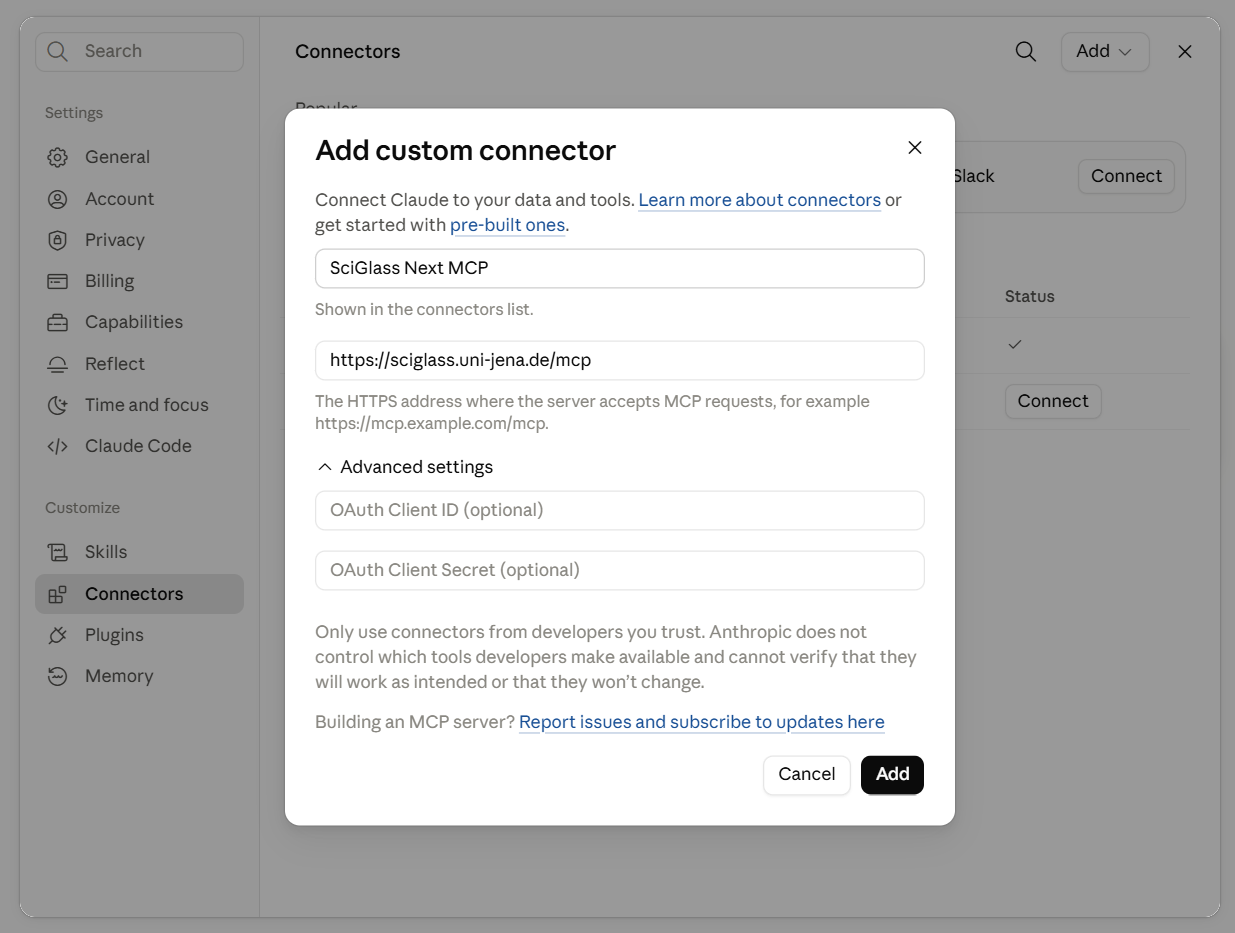
You will be prompted to log in to SciGlass Next. Log in with your SciGlass Next account.
After login, you will be prompted to grant access to Claude. Click "Yes" to allow. Once authorized, you will be redirected back to Claude.
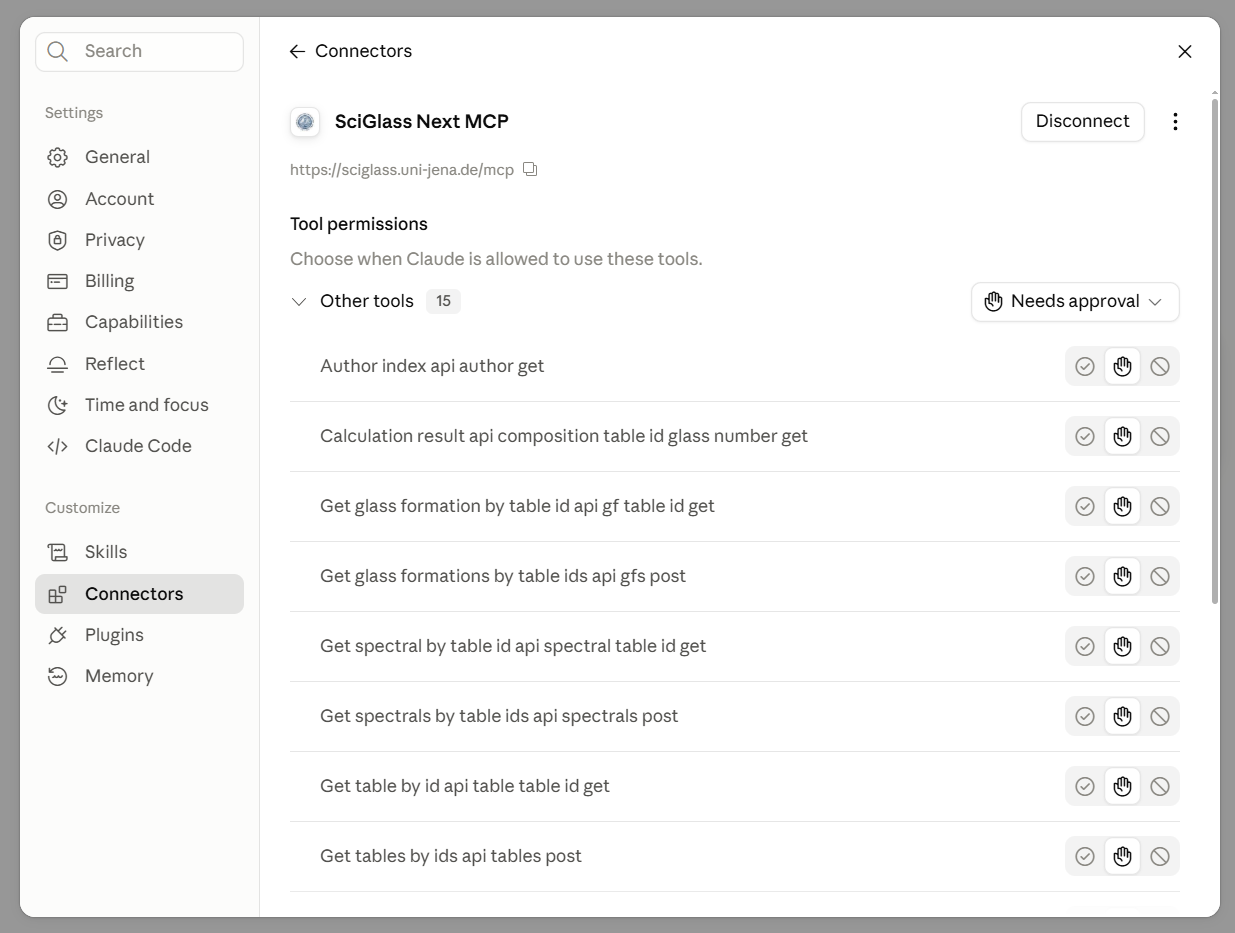
You should see the available tools after a successful connection.
Using Claude Code
The following demo uses Claude Code v2.1.232 on Windows 10.
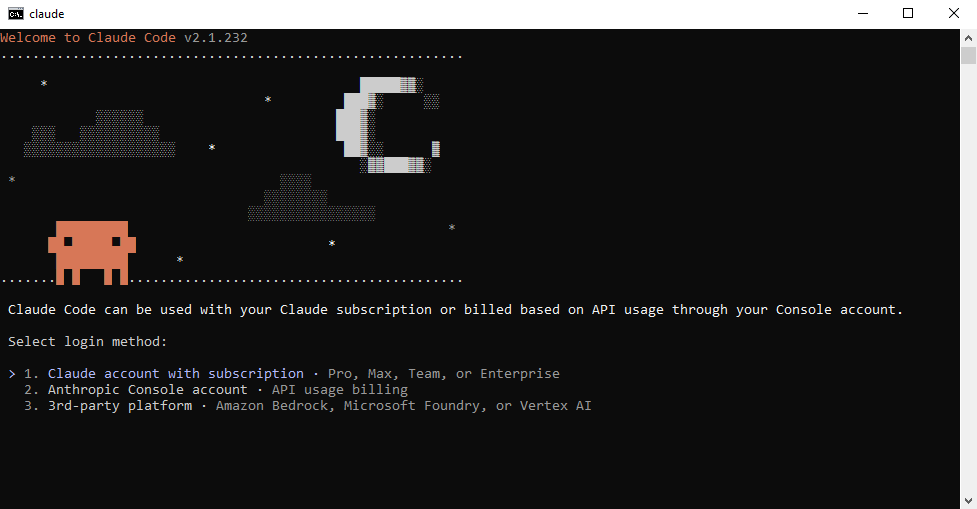
Please refer to the official guide on how to connect Claude Code to tools via MCP.
Add the MCP server
Added HTTP MCP server sciglass-next-mcp with URL: https://sciglass.uni-jena.de/mcp to user config
File modified: C:\Users\XXX\.claude.json
Check the server details
sciglass-next-mcp:
  Scope: User config (available in all your projects)
  Status: ! Needs authentication
  Type: http
  URL: https://sciglass.uni-jena.de/mcp

To remove this server, run: claude mcp remove sciglass-next-mcp -s user
The Status: ! Needs authentication message means the server still needs to be authenticated.
Authenticate from the command line
From v2.1.186, claude mcp login <name> runs a configured server's OAuth flow directly from your shell, so you do not need to open the /mcp panel inside a session.
Starting authentication for "sciglass-next-mcp"...
If the browser did not open, visit:
  https://...

Waiting for authorization... (^C to cancel)
Or paste the redirect URL here:
You will be redirected to the login page. Log in with your SciGlass Next account.
After login, you will be prompted to grant access to Claude Code (sciglass-next-mcp). Click "Yes" to allow.
After successful authentication, you will see this message in the terminal:
You can verify the connection again with claude mcp get sciglass-next-mcp:
sciglass-next-mcp:
  Scope: User config (available in all your projects)
  Status: Connected
  Type: http
  URL: https://sciglass.uni-jena.de/mcp

To remove this server, run: claude mcp remove sciglass-next-mcp -s user
If you still see Status: ! Needs authentication after successful authentication, your account most likely does not have the required access.
Please check whether you can access the database and contact us if you need help.
Troubleshooting
Please refer to the documentation for your MCP-compatible tool for instructions on connecting to a remote MCP server.
If the connection still does not work, please contact us and include the detailed error message and the time you tried to connect.
Some tools require a redirect URI (callback URL) to be registered on our side. If you encounter redirect issues, please contact us and include the required callback URL from your tool.
If you still encounter any issues, please contact us.